I was kind of happy before I rendered the entire animation.
Now I'm not, but it stays as it is at the moment. Probably for ever because I don't have a habit of coming back to what I don't like.
It doesn't apply to moneymaking things - just to be clear :D
Any ways here's the process:

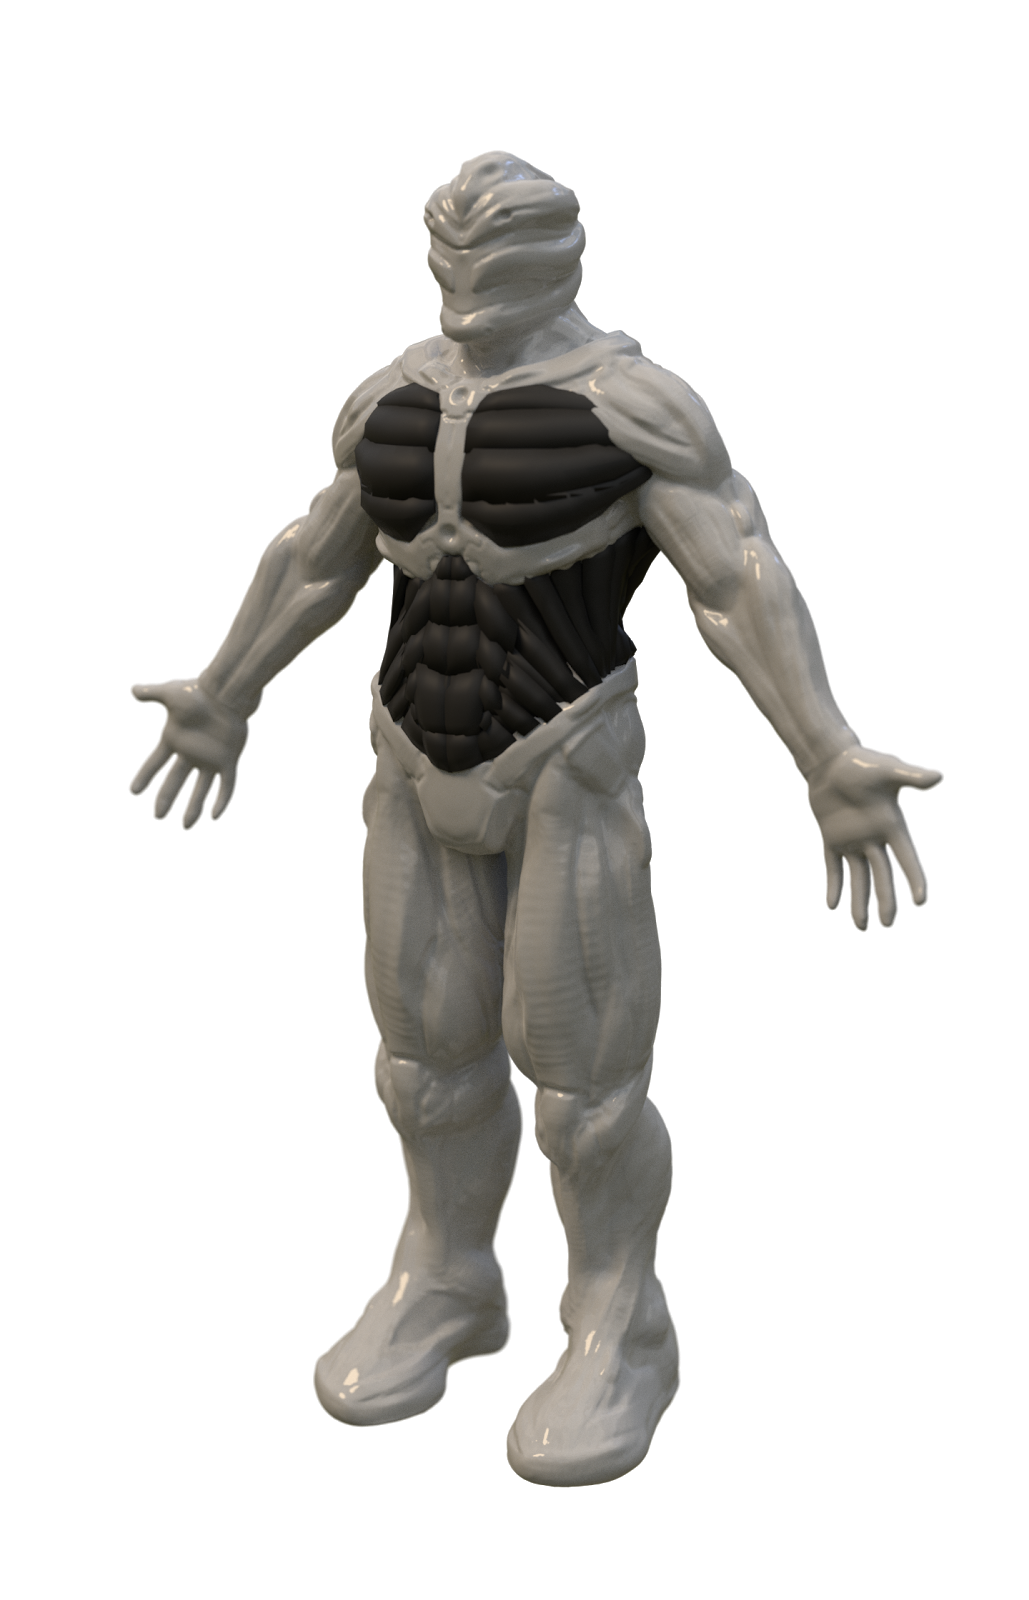
As always when I do organic stuff (not that I do a lot of anything) I started with basic sculpture.

It's just a rough idea, but I retopologized it as you can see.
When it came to the horns part I was like "I dunno man, It ain't feels good - clipping happens, you know?" so I gave them some more room.

Then I started standard push and pull part and some subdiv to get some more geometry to work on.

I made his head smaller to make him look more masculine.


Some further push and pull and at this point I know that I want to animate him so I gave him that weird face and dental sphere.
Gave him is a good term because I didn't model it. I used Teeth & Tongue set made by Alex Lashko.
I still work on my own set of reusable meshes like for example high res eyes, teeth, boxes, pouches, basic anatomy meshes and all that stuff that may speed up my process and modelling that wasn't my goal this time.


That one ^^ oh boy. Basic mesh had 12k of vertices, each eye 1,5k (don't ask - I've no idea how and when it happened) and the teeth set something like 14k (but I don't remember well so don't quote me on that).
To add to that I was using subsurface modifier with Catmull-Clark on. For those of you who don't know - SSM divides each square face on 4 smaller quads and CC is and algorithm that smooths out the edges of subdivided object.
I thought that I need CC for my model to look smooth and juicy, but it has its drawback - your computer may choke on your poli count during animation.
Sadly I decided to ignore that fact and sculpt even higher res version of model from which I baked normal maps.
To bake normal map you have to UV unwrap model - It's quite a lot of work...

So I was quite unhappy when I had to resign from my cozy little SSM and CC to get my performance back. What you see above have 7,5k vertices total (with teeth, eyes and stuff) so I did very heavy cutting and smoothing.
I had to basically recreate the shit out of it. I also put some flat colours - sorry no pics for that.

Some bump, roughness and specularity maps. Stuff's basically hand-painted. I mean everything. Veins flats, pours stencils, you name it.
Is there a faster way? Simpler perhaps? Yup, but I wanted to learn that particular thing, so I did it my way.

Ambient Occlusion is baked, but I tweaked this and that in Krita and merged with colour texture.

Oh and that one is fun.

I mean look at this. As simple as it could be. I was working with Unreal Engine for quite a while, and when they introduced principle BSDF shader in Blender I was like "F*ck yeah! PBR - here I come!".
Red: blood;
Green: skin;
Blue: normal_maps;
The amount of blood is controlled by blood_mask which is just a simple greyscaled *.png so it won't destroy the skin texture below it and I can change it in any moment.
The more white it gets the more blood shows up. The fun part is the normal and bump map region.
The brighter the texture the more convex the surface is, which means that when I do some vector math the blood spots will be showing as if they were on top of skin, not the skin itself.
Nothing too complicated but it gives the results.

And that's in a case you wondered how the corrected topology looks like.

Here I gave him a little fancier lighting setup. Now I'm using Wouter Wynen's HDRI key light and two lamps. Front fill light(I know how it sounds, but it is what it is) and back rim light.
Here's a short animation without facial animations.

I think here's when I started to play with shapekeys.
Man, what are those shapekeys tho'?
You got your base mesh. The value is set to 0.
Then you change the mesh. For example you move few vertices around and set value to 1.
Now the computer calculates what's the change between 0 and 1 and if you set this variable to 0.5 you'll get the shape that is 50:50 mix of your base mesh and your changed mesh.

In my case changes are driven by movement of "bones" on the right side of his head.

That's 0.

And here he's like 0.5 blinking, 1 angry, 0.2 showing his teeth, 0.5 smiling and have 0.15 face muscles cramp. Clear enough?
Ok then. Let's go to bloom effect. I'm using someone else's setup (I saw that on youtube I think but it was quite a while ago so I don't remember who's "the Giver") but I'll get you through it anyway.
Before:

After:

You can copy that and play wit it by yourself to better understand it but:
- Viewer nodes are just for me to check what looks how - you can get rid of them;
- map value basically creates more B&W contrast;
- colour correction blows values that are feeded by map value node. That way only the light parts are shifted toward whites;
- blur gives that fuzzy effect on the model edge;
- add... well it ADDs some of that blurred version to non blurred version and controls the intensity of effect. It also saturates the image a little bit.
You probably noticed this weird lines on his trapezius and sternocleidomastoid muscles. I noticed them too late. Here's why:

You see? Well I don't see it neither. It only appears in render. It's not light. It's not bad topology I think. I mean there's no poles, no double verts, its flat, it's all connected, I double checked my UVs and texture.
Magic!
Or more believable version - I missed something.
I just don't simply want to render that animation again but I'll fix it.
Any ways final (at the moment) looks like that.
I didn't switch on particles collisions so embers are clipping through him few times. Oh well...
That's it.
So long.